Friday, April 8, 2011

Yes, new stuff (sorta)

Wait, there was some new stuff to post today.  Well sorta.

I was able to hook my laptop with FMS to my big screen TV (38")!  That was a lot of fun and a lot better than the puny 15" display.

Well, it didn't photograph very well, but you get the idea.  I think I was flying around the island scenery selection.

So much for the FMS update.

There is some construction going on at my work and I noticed that they are using the blue Styrofoam insulation.

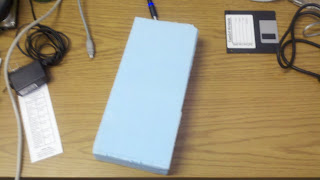
I hear this is great stuff to use to repair foam planes so I hunted around and found a scrap piece.

Now I'm not exactly hoping to use it, but if I need it, I have it.

More to come.  I still need to attach my rudder and elevator to the tail of my plane and resolve the issue of my rudder moving more to one side than the other.  So keep posted.

Thanks for stopping by my blog and please post comments, good or bad.  Be sure to come back and check for future posts.

Old stuff

Nothing new to post right now so I thought I would post pictures of my older plane.

This is a very interesting plane in that it has a 4 channel controller; rudder, elevator, speed control (3 speed) and bomb drop/camera control!  Yes, it actually came with a small key-chain camera with a shutter control that can be plugged into the receiver.

This plane is not very easy to control as it is not digital proportional at all. The servos just bang one way or the other, full lock.

The NmMH battery does not hold a good charge any more so flying time is very short and it does not have the power to carry the camera.

Well it was fun and as you can see, no serious damage even though there has never been a planned landing.

Thanks for stopping by my blog and please post comments, good or bad.  Be sure to come back and check for future posts.

Sunday, April 3, 2011

More power!

I finally received the parts I ordered to complete my LiPo battery packs.  What I received are the power leads with Tamaya (I thinks that's the right spelling) connectors and the charging leads with connector for a three cell series pack. I also picked up an inexpensive balancing charger and a really cool little device that will show the voltage state of each cell as well as the whole pack.

This is a picture of the pack after all the wires were soldered. It's essentially ready to go with the exception of protecting it with tape or heat shrink.

This photo shows the pack connected to the pack reader. It is currently showing the voltage of the whole pack.

This little pack reader is cool.  It will cycle through each cell and show it's voltage.  Once through the whole pack it will show the pack voltage.


This picture shows the pack connected to the charger. The red light shows that it is charging. It will turn green when complete.


One item that I wish I had left on my order was a pack balancer. This little device plugs into a pack and will bring all the cells in a pack to the least safe level. This is done so that they are all in the same state and "balanced".  I know the charger will do this but I could have one pack on the charger and another on the balancer.

I found one big issue when I went to connect the pack to my plane. The power connection was wired wrong!   Good thing I was looking and did not plug it in and hit the power switch.   I'm sure I would have let out all of the magic smoke from everything!

It was a simple, but tedious, matter of reversing the leads in the connector and I was set for a test.

Wow! What a difference in power! And I should get almost double the run time (1300mah to 2200mah).

Thanks for stopping by my blog and please post comments, good or bad.  Be sure to come back and check for future posts.
Published with Blogger-droid v1.6.8

Friday, April 1, 2011

More tweaking and modding

So I know that there were some issues with the tail of my plane because, as I noted before, I noticed the tail of my plane torquing over when moving the control surfaces.  I finally had a chance to take a look at it and found some causes and more issues.

 You can see from this picture the bush rod is bumping out the side.  This was due to the rudder not moving as freely as it should to one side.  After I fix the cause (see below) I will use some clear packing tape to secure it down and add rigidity to the tail spare.  I will do both sides for symmetry.
 In this picture you can see that the push rod is touching the foam slot and really binds when the arm is moved to the left and right.
 This is the right side (rudder) and it is  doing the same as you can see.
 Here is the culprit of the rudder push rod bowing out.  The rudder is hitting up against elevator.

 In this photo it  looks like everything is where it is supposed to be and that the issue is with the elevator surface connector.  I have decided that I will remove the surfaces and redo them with more space in between and give the rudder more room to make those left turns.
You can see the knot I put in the antenna wire.  This keeps it from pulling inside when I pull out the receiver.

I also found  that the foam hinges, while helping it go together fast, are very stiff and make it slower to respond and you don't get as much movement.

When I  put them back together, I still have not decided if I will use tape hinges (fast, easy, but not as robust) or thin plastic film hinges (much more difficult to align and glue in, but more sturdy).

As usual, more to come.

Thanks for stopping by my blog and please post comments, good or bad.  Be sure to come back and check for future posts.