Thursday, November 1, 2012

What Mods to make to your Wild Hawk

Hello all,

Once you've played with your Wild Hawk and have become comfortable flying it, you can get the bug to take your Wild Hawk to the next level.  With this in mind, these are the mods I would recommend, and have made, to my Wild Hawk.

Here are the mods that I recommend and the order that I would make them.

First mod: Fix those tail hinges

I originally thought of putting this in with what I would do with a new plane out of the box, but decided it was too much of an upgrade to include there.  What I propose here is to cut the movable rudder and elevator surfaces off and replace the factory foam hinges with tape hinges.  This is a little more complex than it sounds on the surface.  Once the parts are cut away, they need to have the old hinge surfaces trimmed up.  The elevator surfaces should have the plastic connector piece removed and then they should be reconnected with a bamboo or other dowel.  I recommend increasing the gap between the two surfaces (the gap for the lower portion of the rudder) by about 1/8 of an inch.  This will help to ensure that the rudder will have the most motion possible and not hit the elevator.  Now you can follow my hinge post on how to do the actual tape hinges.

Second mod: Update that battery

I really feel that the next mod it to replace the NiMH battery with an upgraded LiPo battery.  The energy density of new LiPo batteries is just too much to pass up.  For about the same weight you can almost double your mAH rating and run time.  This is done by checking out your favorite hobby supplier and seeing what LiPo options are available.  I recommend 1300mAH to 2200mAH, 3 cell (series connected cells), LiPo packs.  Most likely these new battery packs will not come with the same connector and you will need to replace the connector on the battery pack to match the speed controller, or replace the connector on the speed controller to match the battery pack.  This is easy enough to do if you know how to solder.  If you don't, find a friend or hobby shop person that can do this for you.  This new pack will also supply more voltage to your motor.  Your new 3 cell LiPo pack will provide 11 to 12 volts as apposed to the 8 to 10 volts of the NiMH pack.  This will give you more RPMs out of your motor and more thrust.  I think you will find this especially helpful during take off.  Some people have warned me about the possibility of burning out the stock brushed motor.  While this is possible, I have not noticed any issues with this and have been pretty harsh on mine.
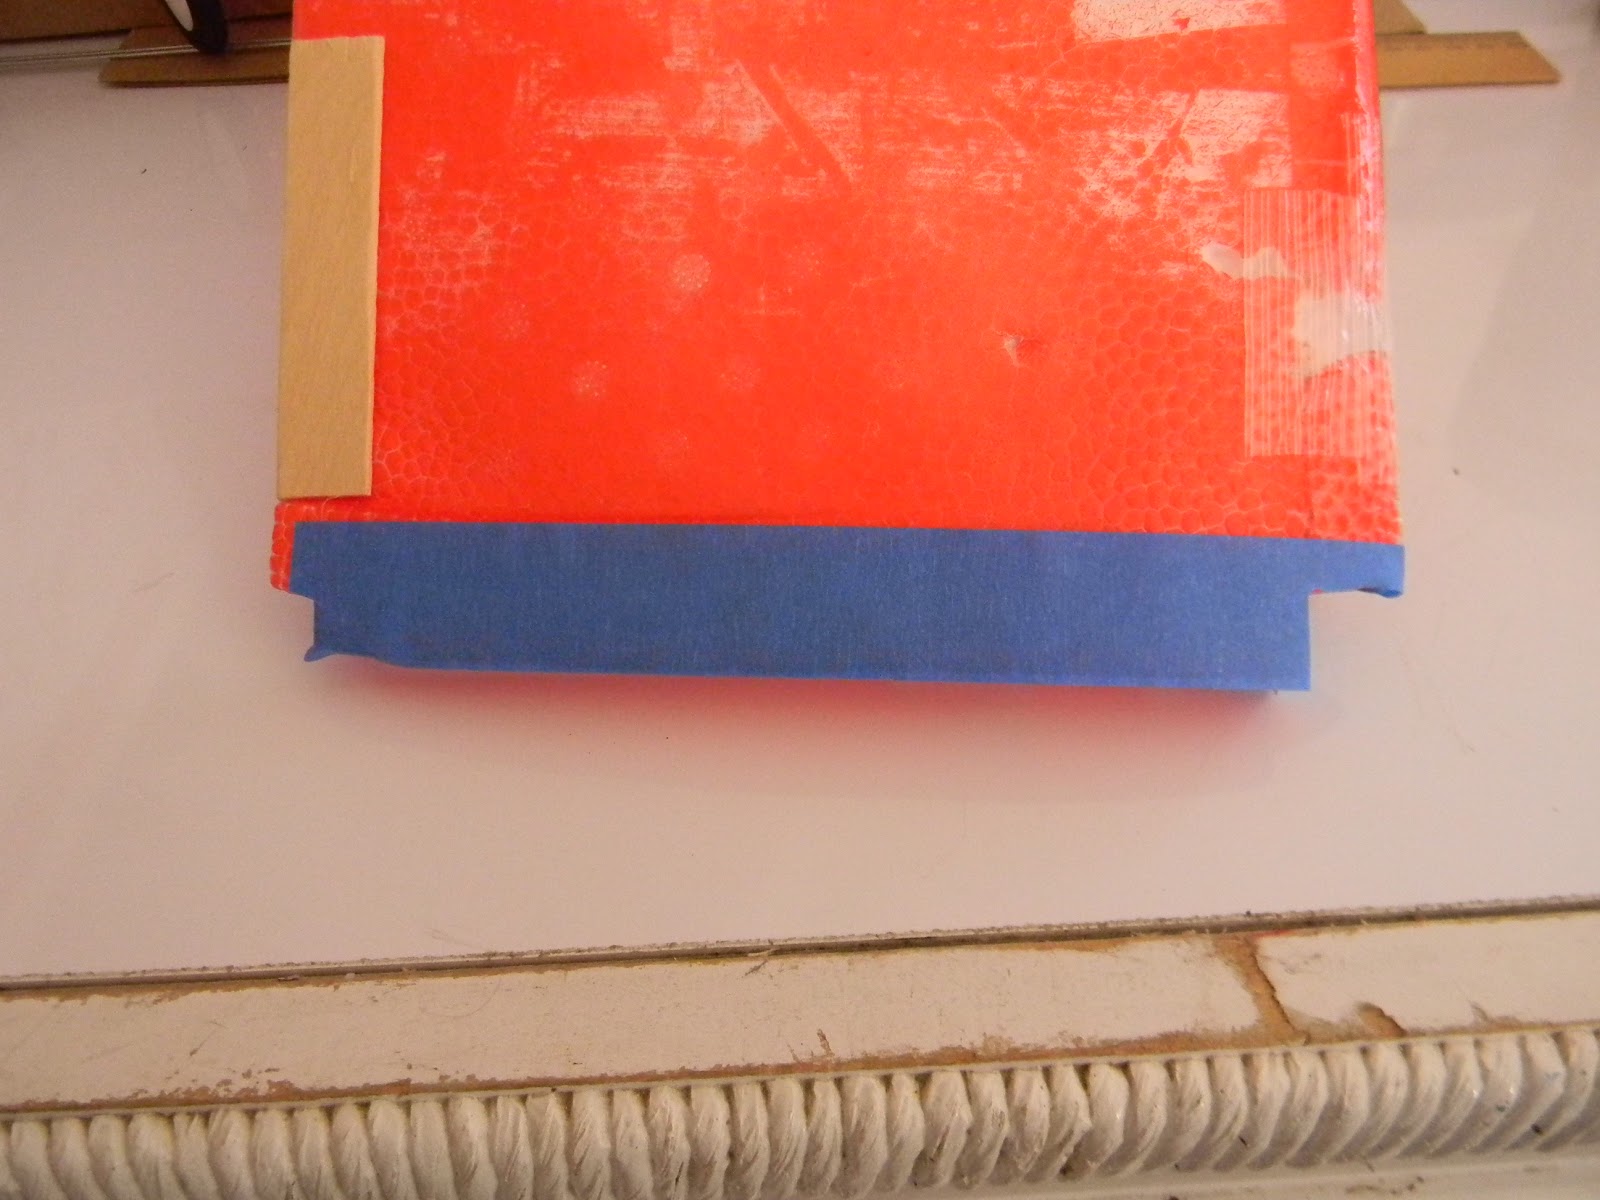
I did a pretty severe mod to make sure that my battery fit the way I wanted it to.  I actually cut off the top of the nose and used a soldering iron to melt the foam until the battery fit snug.  Then I hot glued the top of the nose back on.


Third mod: Cut in some ailerons

I feel that this is an interesting mod because it can be done before upgrading your transmitter and receiver to more channels.  As I found out, it's actually just as easy (if not easier) to fly with just elevator and ailerons as it is with elevator and rudder.  I detailed my aileron mod in this post.


Fourth mod: Upgrade your radio

The fourth mod that I would suggest is to upgrade your radio to a 6 channel radio.  I would go beyond a four channel radio (which would be enough for all the controls needed on this plane) only because I really feel that 6 channels is the minimum for a really useful radio setup.  This is probably the easiest mod that you can make to this plane.  The hardest part is deciding what radio you will upgrade to.  I purchased the least expensive 6 channel 2.4GHz radio that I could find because I wanted the benefits of 2.4GHz (small antenna and spread spectrum technology) and I'm a cheep Dutchman.  My cheep radio is not the easiest to use, but has not let me down.

So this mod is as simple as replacing the stock receiver with your new one.  You will need test and make sure that you get the servos plugged into the correct locations and make sure that you get the polarity right.


Fifth mod: Upgrade your speed controller and motor

This is probably the most gratifying mod, as when it's done right, it can really boost your plane performance and enable you to do some really fun things.  The things you can do?  How about belly take offs without landing gear and vertical flights to high altitude. The biggest thing to take note of here is that this plane is limited on the size of the propeller that can be installed.  I've only been able to upgrade to a maximum 6 inch propeller.  This means that you will need to turn this propeller faster to get the extra thrust needed to be able to do the things I mentioned above.  So, the Kv rating of a motor becomes an important factor to keep in mind.  The Kv rating refers to the RPMs per volt rating of the motor.  I recommend 2200Kv brushless motor.  This is a bit high, but a 1400Kv motor, while certainly enough power, will not give the really fun performance we're looking for.  We also do not want a motor that is too small and so we will want to look for a motor that is rated in the 250 to 400 watt range.  This will ensure that the motor will handle the current and voltage without overheating.  Once your motor is selected, then you need to find a speed controller that will handle the current rating of the motor.  Also look for a speed controller that will be easy to program or need no programming, and has an adequate BEC to power your receiver and servos.  Depending on the pieces that you put together you may need to modify your power connectors at the battery or motor.  I was able to purchase my battery, ESC, and brushless motor from the same company (Turnegy) and so they all fit together without any changes needed.  Unless an in-runner brushless motor of the same diameter is found, you will be using and out-runner that will need special mounting.  I cut the motor nacelle back and added a wooden fire wall.  This was placed such that the propeller would be located in the same place as the original.  This post will show exactly what I did to upgrade my ESC and motor.

Thanks for stopping by my blog.  Please feel free to post comments, good or bad, and be sure to come back and check for future posts.

Tuesday, October 16, 2012

Wild Hawk Flying Fun

This post will be a double post as this post will serve both my Wild Hawk blog and RC Flying Fun blog.  How you ask?  Well, I found a new place to fly and I flew my Wild Hawk for my first outing at this location.  This is also the first time flying for me in several months.  Wow, a person can sure get rusty!  This new location is on a road stub near an abandoned mall construction site.  This road stub is off of the main road and across from the abandoned mall.  It is also surrounded by farm land used for growing hay.  There is a small group of flyers that get together each Sunday at this location.  One of the best features of this location is that it is only about ten minutes from my house.
why did I pick a place like this instead of a formal club with a real runway and amenities.  Well, I already joined the AMA (I recommend this membership for everyone in this hobby) and money is really tight right now (you folks with kids in college know what I'm talking about).  So funding my hobby and paying club dues and AMA dues is out of the question.  This site fits my budget and still gives me a good group to associate with.
Any way, here are some photos of this location including pictures of my Wild Hawk airplane getting ready to fly.


I did have an accident and crashed hard after failing on an outside loop.


It looked bad but I was up and flying again after some minor repairs and a battery swap.

I flew all three of my batteries this day.  The only unfortunate thing was that on this day there were no other flyers that showed up.  I had a good time anyway and could fly and land anywhere I pleased.

Before publishing this post I got a chance to fly again and made a video from one of my flights.  Enjoy this areal look around.

Thanks for stopping by my blog.  Please feel free to post comments, good or bad, and be sure to come back and check for future posts.

Sunday, May 13, 2012

Blown Motor

Recently I got a little ambitious and decided I wanted to fly my Wild Hawk in the wind again.  We  had a few good days of wind and I got my opportunity on a recent Sunday.  My oldest daughter is home from college and she graciously offered to spend some time with her dad and be my film crew.

We headed out to the nearby park that I like to fly at and setup for a windy day of flying.  We were all set to go and then this happened (see the video below)


Not but a few seconds in the air and the motor suddenly quit!  My big head gets in the way so you can't see the crash landing.  Fortunately it is spring and the local growth in the wild life area is about three feet high so, no damage at all.

After retrieving my Wild Hawk, I tested things out and the following video shows what I found.


You can see that the motor would do little more than stutter around and mostly not turn.  I was so disappointed because this meant that most likely I was buying a new motor.

Time to take this plane back home and check everything out.

Testing the ESC
I  suspected that the motor was at fault but the first thing that I did was to check the speed controller with another motor, just to make sure.  This picture shows another motor connected as well as my servo tester.  This test showed the speed controller to be working just fine.

Now I have to dig into the motor itself to see what is going on.  I started by taking it apart.  This was easy and just required the removal of a snap ring and the can with the magnets just slipped right off (OK, I had to tug pretty hard to get past the magnetic pull).  I then gave it a good inspection looking for obvious problems like broken or shorted wires.

Problem found
Since I did not find anything obvious, I then used a multi-meter to test the windings.  I had continuity between the black and yellow wires but not between the red and any other wire.  This meant that there was and issue with this part of the wiring.  After some closer inspection (this included the high tech method of tugging on the wires and connections), I found that the bullet connector had a cold solder joint and actually pulled right off (yeah, tug test found this one).
The repair

This merely required the correct application of heat and solder to fix.  I also found it helpful to make sure all of the heat shrink was where it was supposed to be before I got too far.  Next time I'll be more careful with this.

Any way, this fixed my problem and within 30 minutes my daughter and I were back out at the park and flying in the wind.  See my next post for that experience.

As usual, thanks for stopping by my blog and please post comments, good or bad.  Be sure to come back and check for future posts.

Sunday, April 1, 2012

How to setup a brand new Wild Hawk

Hello all,

"Thinking out of the box"

There are people who have expressed an interest in how to best setup their Wild Hawk out of the box and there are those who complain that their Wild Hawk is a piece of crap and does not fly.  The information that both people need is the same.  There are several configuration updates of a stock Wild Hawk that are important to make it the good flying plane that people love.

This is what I would do to setup a brand new, out of the box, Wild Hawk:

Glue tail surfaces
While the double face tape used to secure the tail surfaces on the Wild Hawk is adequate and will hold the parts together for quite some time, it will come loose.  My recommendation is to just glue it up from the start and don't risk them coming loose in flight (yes, I have experienced this).

This shows the elevator flush with the end of the tail spar.
The first thing that needs to be done is to remove the double face tape.  If you skip this part, you risk your parts coming apart as your gluing will only be as strong as the tape.  Taking the tape off is not easy, but can be done with just your fingers.  Using tweezers would probably make this task much easier.  Now that all of the tape has been removed, its time to glue things up.  It's important to glue the elevator in first and them add on the rudder.  Take your time with this step and make sure the parts line up.  The elevator should line up at the tail end and not the front edge like it might seem.  If you don't line it up this way, you will risk the movable surfaces hitting they tail spar and not moving properly.

Re-position the battery
I don't know if it can be clearly seen in this photo, but the battery
us upside down.  It will be rotated counter clock wise and slid
forward as far as possible.
This modification require the removal of the foam ridge at the forward most edge of the battery.  This piece of foam it not that easy to remove but it can be done without too much trouble.  Once this is removed, the battery can be placed back in upside down and with the power wires still in the side cut out for them.  Since the Wild Hawk is notoriously tail heavy and does not have a proper center of gravity (CG), this is the minimum that must be done to make this plane flyable.  This does not resolve this plane's CG issues, but give you a good head start.

Don't install the landing gear
While you're learning, you will not need the landing gear.  Don't even bother installing them, they will just get in the way.  Just make sure that you are flying near a nice grassy area and learn to belly land your Wild Hawk there.


Tape up fuselage
This is an important step to help make sure that your Wild Hawk is as rugged as possible.  I have a whole post dedicated to this and it can be seen here: How to tape a Wild Hawk


Tape up wings
This is another important step as well in making sure that your Wild Hawk is as rugged as possible.  This step is also covered toward the end of the above blog post link.

Balance for CG
This is an important step in making sure that your Wild Hawk is as flyable as possible  I like my Wild Hawk leaning toward the nose heavy side and so I have my plane setup to balance at about 2 1/4 inches from the leading edge of the wing.  This is my CG and is just forward of the embedded wing spar.  A lot of people have theirs set for a CG of 2 1/2 to 3 inches from the leading edge.  This will require the addition of weight to the front of the plane.  I started by literally taping washers to the nose of my plane.  This worked fine and has worked fine for others that I know.  I decided to do something that I felt would be better and more permanent for mine.  What I did was to tape fishing split shot to my plane nose until the CG was right again.  Then I used my solder iron to melt some holes into the nose to hold the split shot.  When this was all in place, I used hot glue to secure it all.  I have a post here that shows how I did this: Weighted Question.  This post shows how I made a CG finder: CG Finder

Now your Wild Hawk should be very flyable and ruggedised.  If after all of this you are having issues flying this plane, the problems are not with the plane.

As usual, thanks for stopping by my blog and please post comments, good or bad.  Be sure to come back and check for future posts.


Thursday, March 22, 2012

Wild Hawk vs Wind

For all of you who think you can't fly a foamie in the wind, let alone a Wild Hawk, I'm here to tell you you're wrong!

I had the opportunity to go out flying with my Dad (for my birthday,thanks Honey) this past March 10.  I like to go to his place because he has a really nice park to fly at, with lots of room and either dirt or paved areas to use as runways.  The week up until then was beautiful and really fooled us that the weekend would be great also.  Well, by the time we got there, the wind had really picked up.  We waited around his place doing misc. fixes and playing with other stuff hoping that the wind would calm down.  No such luck!  We decided to just go and see what would happen.

We got there and I think the wind was worse.  Easily a 15mph steady wind with gusts from 20 to 25mph!  There was another person their flying a 40 class Cessna style plane, and struggling with it.  He soon landed and started to pack up.

I decide what the heck, I'm here to fly and I'm gonna fly!

Now my plane is a bit modified with substantially more power and equipped with ailerons, and that really helped my confidence.  (Click on some of the pictures for a link to the item I added)


So I took out my Wild Hawk and struggled to get the wings on without them being blown out of my hands by the wind.  I got everything together and walked out a ways from our cars and set the plane down facing into the wind.  We were all worried that the wind would blow it away.  A test bump of the throttle showed that it would push into the wind.  I sent the plane off and it popped right up into that head wind.  I flew full power and my Wild Hawk had no problems climbing.  It did take a lot of aileron to keep the plane level and to keep it's heading as the gusts really bounced it around, but it flew.

I made many passes flying full power into the wind and then shutting down the motor while banking over to let the wind take it.  I would let it cruise by with little to no power and then bank it over again with full throttle.

Considering the wind, my beat up and mended Wild Hawk flew like a dream.  I even did many touch and go landings with now crashes!

I really had a good time!  Easily one of the best times flying yet.

Servos connect to the fuselage
I do have to admit that I did crash twice.  The first time I came in too low and turned the wrong way with the wind and ended up cartwheeling the plane.  No damage though (thank you tape)!  The next crash was kind of crazy.  Some how a gust of wind moved the wing enough to pull out one of the aileron servo connections and I could only bank one way, the wrong way!  I ended up out of control in a kind of death spiral and into the group watching!  Fortunately there were no injuries, and the spectators were OK too.

I had hoped to post some videos of this but my little video recorder was on the fritz and I got no usable video at all.  That was a real bummer.  I am posting this video because it is the same site and it too was a bit windy, not as much but fairly steady 7 to 10mph with gusts to 15mph.


So, If any one says that you can't fly a Wild Hawk in the wind because it's a foamie, send them to this site and I'll set them straight!

As usual, thanks for stopping by my blog and please post comments, good or bad.  Be sure to come back and check for future posts.

Wednesday, February 1, 2012

How To Tape A Wild Hawk

Hello all,

As I have had lots of people asking about, and have seen a lot of questions about how to taping up and re-enforce/protect a Wild Hawk, I thought I would use this post to show how I do it and what I recommend to others.

Note: The techniques shown here can be used on any similarly configured airplane like: the Hawk Sky, the EZ Hawk, the Easy Star, the Bixler, the Floater-Jet, and the Dolphin, just to name a few.

Before we start, I would like to review the type of tape I use.  I use two kinds of tape depending on what needs to be accomplished.  For most of the structural re-enforcement, I use a good fiberglass re-enforced strapping tape.  I've seen some that sure, they had fiberglass re-enforcement, but they were few and far between, about 6 to 10 strands.  I use a brand that has some 18 glass strands for the one inch wide tape.  Initially I looked for a 3/4 inch wide strapping tape, but all the locations I checked were out of the 3/4 or only carried the 1 inch wide tape.  So I bought the 1 inch tape and have not had an instance where I wished that I had the 3/4 inch wide tape.

For preventing puncture and tearing damage to the wind leading edge and part of the fuselage, I use a good clear wide packing tape.  This tape is not that critical just as long as it is not the real cheap and easily torn stuff.

Now on to the taping.  For demonstration purposes I used 1 inch wide blue masking tape.  I figured that this would provide for a good contrast and the best viewing.

I like to start off with the nose as it really needs the most attention as it will bear the brunt of most landings and is the most susceptible to being damaged.

Now I'd like to stop here for a moment to make an observation that taping up your plane in this, or any manor, will not stop damage from happening, but will only reduce the extent of the damage you inevitably will encounter.

OK, back to work!

Starting the tape job
Contouring around the nose
I start with a strip running from the nose, just under the cockpit, to the back wing support.  I use my razor knife to cut slits in the tape so that it contours nicely around the nose (it does not look as nice with the blue tape).  I like to make sure the strip is long enough to wrap around the root of the tail spar.

Bringing support all the way back
Getting around obstacles
This is then repeated on the opposite side, crossing over at the nose and tail spar (just under the propeller).  I feel that this accomplishes one important thing, it provides some structural support in helping keep pieces from coming apart.


Start by centering the tape strip 

Around one side...
Now we start wrapping the nose.  This will give the nose foam added structural support and help keep it from deforming and coming apart in a heavy crash.  You can see that because I have a cutout in my nose (for fishing sinkers to help with CG), I have started a little further back than I normally would.  I start this by pulling off a length of tape that looks to be the right length.  Then, holding both ends of the tape I center it over the nose.

....and under
Around the other side...
Now I let the tape follow the contours of the nose and wrap around under neath.  I do the same with the other end until it crosses the other end on the underside.


...and under again
This ends up producing a nice "X" on the underside.


More taping of the nose
Around one side...
This is repeated again with another strip of tape across the nose just on the edge of the cockpit.  And again, each side is wrapped around so that they cross underneath.


And finish underneath again
...and the other (more obstacles)
This again results in a nice "X" on the underside of the nose and cockpit.

You can see from the picture at the left that I had an obstacle in the way.  I just taped over it and then cut slits in the tape so it would lay flat.

Now for the cockpit and wing support
Tying around the top
Wrap around the bottom
Bringing it around again to the cockpit
Now I start a strip of tape that re-enforces both the front wing support and the back portion of the cockpit.  I like to start this with a strip of tape (again, I just guesstimate the length) laid right down the back slope of the cockpit opening.  This piece wraps over the top and into the wing slot.  The other end wraps around the bottom and back up and over the side edge of the cockpit.  This is repeated again around the other side as well.  I feel that this re-enforces the wing arch as well as the back side of the cockpit.


Now again on the other side
And tying it all together again
These two pictures show what it looks like doing the other side.


Securing push rod guides
Two inch tape on the top
Now we can move on to the final portion of the fuselage, the tail spar.  I start with two strips rounding the circumferences of the root of the spar and just in front of the rudder.  These give support as well as hold in place the push rod tubes.  The next piece that I like to apply, is a two inch wide piece of packing tape across the top of the tail spar.  This reduces down flex and protects against dent and puncture damage.

Left underside runner
Left and right side runner
Now I move on to nose to tail, skid and flex re-enforcement.  I start by laying out two strips that run from the nose to about halfway down the tail spar.  I run these down either side of the bottom leaving just short of the width of the tape at the widest point so that when the center strip is laid dawn, there will be some overlap  over the whole length.

Final nose to tail runner
Contouring the nose again
The final strip down the center runs from over the nose all the way down to the tail wheel.  Again, the nose piece has slits cut in it so that it will lay down nicely.

These three pieces provide for a good skid surface for belly landing and help to reduce flex in the tail spar.

Leading edge re-enforcement
Fixing the tape around the contours
The final part to cover is protecting and re-enforcing the wings.  I start out by protecting the leading edge of the wings with a long strip of the 2 inch wide clear packing tape.  If you start out at the wing root, this should be easy enough to do.  Put the leading edge of the wing right in the center of the tap and then roll it out down the wing.
Top view of tape out at the tip
As you come to the part where it starts to bend up, just follow as best as you can.  This is another area where you will benefit from cutting several slits in the tape so that it can better contour to the shape of the wing.  You can see from my wing tip pictures that I was not too careful with this and it still worked out just fine.


Wing support
These last two pieced of strapping tape that I put on are used solely to re-enforced the wing and help to reduce wing flex considerably.  In fact, this is all that I used before I cut in my ailerons.  Once I cut in ailerons, I had reduced the strength too much and added bamboo rods (One of my other posts covers that).  Now normally I would just run one strip down the center of the wing from root to tip, but I put my aileron servos right in the way.  I came up with this "X" pattern to get around that and it also allows for the shorter piece to cover the wing spar and the bamboo rod I added.

Gouge repair
I have two more items that I would like to cover.  The first one is how I deal with damage to the leading edge of the wings.  While the 2 inch tape does a good job of reducing damage, some times it still occurs.  To help with these I just cover them up with short strips of the strapping tape.


Fixing a loose wing
The last item that I just started doing is running piece of strapping tape around the root of my wing to help snug up the fit.  My wings have been getting so loose, that they have actually been moving in flight.  Well, this really helped to reduce this issue.


So, there you have it.  I hope this is easy enough for everyone to follow and gives you as good of results as I think I have had.

As usual, thanks for stopping by my blog and please post comments, good or bad.  Be sure to come back and check for future posts.