 Now I have ailerons to install.
I started by ordering two servos (9 gram), Y cable, and extension cables from HobbyPartz.com. When they arrived and I opened the package, I was a little concerned with these servos. OK, I know I bought the cheapest ones they had, but still I thought I may have made a mistake. But now after installing them and testing them out, I love them! They are great little servos and faster than the stock ones installed.
The start of measuring the ailerons. This was a bit tricky as I had no plans and only suggestions from the Internet as to how far to start them from the root of the wing. Some people said 5" and others said 2". I decided on about 3.5" and then took them out to just before the wing tip bends up. This will still give me a full aileron if I decide to cut the wing tips off.
The first cut. Very nerve racking. I also decided to make them 2" deep. I had seen others make them only about 1", and then go on to later add extensions. I would rather have to tune them back on the linkage side then add to them latter with extra foam or balsa.
 First aileron all cut out. Now to make a duplicate on the other side.
 Start of installing the hinges. I had originally cut everything square with the intention of doing a hinge like I did for the tail. Boy was that a failure. I found out that that type of hinge works best on thin edges only and on the thick cross section I was now working with, they had way too much play. So I changed gears and went to the bevel cut and top side tape hinge. A much better plan.
 Hinges installed. Just used strapping tape. I had fully intended to use a single strip of clear packing tape, or at least to cut even sized pieces and to a neater job, but I got impatient and just used them like they are.
I made my own control horns from an old AT&T SIM card (see it in the picture?). These were just pushed into slots cut with a razor knife and then glued with a bead of hot glue. To make the slot I just lined them up with the servo arm, tilted them over, and cut down the edge with my hobby knife (the one in the picture).
 Both servos installed. I hot glued the Y cable connectors into openings cut just below and behind the leading edge of the wing (
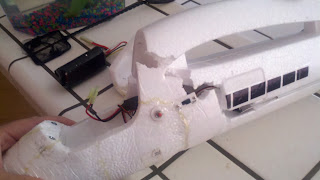
 UPDATE - here are photos of the Y cable with the socket ends secured in the sides of the fuselage.
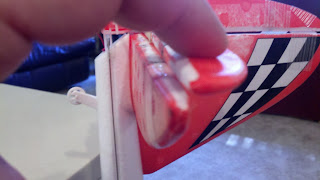
 Detail shots of the servos and the control horns installed. You can just see the hot glue beads on either side of the horns. I made cut-outs in the wings for the servos by setting them in place and cutting around them with a hobby knife. I then cut out the foam as best as I could and used a hot nail head (held with pliers) to smooth out the bottom of the cut-out. The servos only sit in about half of their thickness. I figured that would be good enough. They were then just hot glued in.
 Check out the snazzy push rods. They were made from one large paper clip! From this photo you can just make out that the servo is at the end of, and just to one side of the wing spar.
Aileron test before flying. Not the best video as I was doing the camera and controls (who needs a tripod!).
I really like how the plane flies now and am waiting for my first chance to find out how well it performs in a wind.
UPDATE:
See my other blog post rcflyingfun flapperons to see how I upgraded this to flapperons with a new 6 channel radio and mixing.
Thanks for stopping by my blog and please post comments, good or bad. Be sure to come back and check for future posts.


