So I'm off on break the Friday before the new year and I scheduled a day of flying with my Dad. He has a flying buddy with access to a private field and was able to get some time on that Friday for us to fly out at the private field. This field has a dirt, but smoothed out, runway out in the middle of open farm land. My Dad brought out his Radian and his buddy took out his T28 for us to try out. I, of course, brought out my Wild Hawk.
I arrived about 11:00am and we were out at the field by about noon. John (Dad's buddy) sets up T28 around. Wow, that was a lot of fun! This plane is very responsive while still be easy to control. Now I do have to say that the transmitter (a really nice Spektrum 6 channel) was set for a slow rate. I flipped the switch to fast rate and about as quickly as I lost control of the plane, I switched the rate right back to slow! Way to responsive for my current skills.
This is where things started going south for my Dad. I handed the controls to my Dad so he could check it out, and pretty soon he was getting to far away. John advised that he should bring it back before it was too hard to control, and guess what. Well, he tried to get it back but lost orientation and handed the controls back to John. Too late! It dove into the ground and broke the wing off.
Dad then got out his Radian for a flight. A quick had launch out and the plane was not gaining altitude. About 50 yards out the right wing tipped up and caught the breeze and with the low altitude, cartwheeled the plane into the groung! Another broken plane!
Well, I got out the Wild Hawk and after two failed take off attempts, I hand launched it into the air. I had a great flight with my make shift cell phone video camera on board (unfortunately something went wrong with the camera and the video file was messed up, so no video this time). I landed it, took the camera off and hand launched it again. I trimmed it out again since the loss of the camera weight, and asked my Dad if he wanted to fly it. He said "no" as he did not want to chance wrecking another plane!
After this flight it was time to head home and get some lunch. After lunch we checked out a local city park that people were known to fly at. This turned out to be a great place to fly! It's this huge sunken area surrounded by 10ft berms with parking areas. We quickly headed home to get out planes.
We returned, me with my Wild Hawk and Dad with his Wild Hawk (Old Hickery) and his second plane (my brothers Wild Hawk that he procured). We parked right up to one side with the slight breeze coming in toward us. We had about 15ft of grass to the grassy berm. I took off and landed on the parking lot and Dad hand launched out off the berm. What a perfect place to fly! We flew and flew almost till dark! I burned off the 2200mah battery and started another. Dad did crash and damage my brothers plane (he flew it behind us and lost it in the sun!), but continued to fly with Old Hickory. We had soo much fun and had such a great time flying. I think I had easily, a solid 30 minutes of air time! We would just take the planes up and then cut the power and see how long we could glide around. We had a great time bringing them in for low passes and trying to land at our feet (I have to admit that Dad took the prize here). We are definitely coming back here again!
Sorry there are no pictures, the video didn't come out and I was so distracted by the great flying that I didn't take any pictures.
Thanks for stopping by my blog and please post comments, good or bad. Be sure to come back and check for future posts.
Showing posts with label flaps. Show all posts
Showing posts with label flaps. Show all posts
Saturday, December 31, 2011


Thursday, December 15, 2011
Flying With Landing Gear
This was an experiment that I could hardly wait to perform and I finally got the chance. My oldest daughter is finally home from college for Christmas break so I recruited her to film while I flew. It was a beautiful clear day but the wind was starting to pick up. I was rushing to get things done so that I could get out before it got too windy. I know that I could have waited for the evening calm, but I did not want to risk that the wind would settle and that something else would not interrupt my day. So out we went and braved the elements anyway. When we first arrived it seemed that we would luck out with the wind lining up with the walk way. Well as usual the wind did not flay nice and it had fun crossing at an uncomfortable angle.
Not to be outdone, we flew anyway. The wind did not make things easy. After a few attempted take offs (see one of the last videos below) I finally made it into the air. It was much harder than I expected to taxi in a straight line. Especially with the wind buffeting the plane from the side, especially when it was just about to get off the ground.
Once in the air, it flew just fine. The the addition of the landing gear had no noticeable affect in the Wild Hawk's flight. As the wind was causing the plane to bounce around quite a bit, it might have been masking any affects of the landing gear, but I don't think so.
This first video shows the first successful take off. I thought sure that I was going to crash into the cable again, but I just pulled back on the stick and luckily had enough airspeed to take off successfully.
This second view shows the first successful landing. I came in dead stick because it was coming in fast enough and with power would have been too fast. I know too that this was because I was landing with the wind, but it worked out OK. I did think for a moment that I was going to land it on the walk way cable, but I made it to the pavement.
This video shows both the take off and landing from the airplanes point of view. If you would like to see what I did to get this footage see my other blog RD Flying Fun. I'll be updating it soon with how I modified a cell phone to take this footage.
Like the last time I flew, I had so much fun after the first flight that I just made sure all was still OK and then just took off again. This was a shorter flight as I didn't want to battle the wind for too long and it was too cold for my daughter and I to stay much longer.
My daughter filmed this flight as well. The first video is the entire flight from take off to landing since it was such a short flight. You can see that it took me quite a bit to get it under control, but I made it into the air.
Landing was another issue again. You can see that it came in on an angle and kind of "crabbed" in.
Landing was another issue again. You can see that it came in on an angle and kind of "crabbed" in.
This video is the second flight from the planes perspective. You might have noticed by now that the perspective is different than from the ground video. What I did to get forward facing video had the affect of switching the video left for right. When the plane is going left in all of these videos from the plane, it's really going right!
OK, this is the, well, blooper video of my failed take offs from the ground our perspective and from the plane's perspective.
Yeah, I could have cut some time out of this video, but I thought it was interesting seeing all of this stuff from the planes point of view.
Yeah, I could have cut some time out of this video, but I thought it was interesting seeing all of this stuff from the planes point of view.
Ouch, that last one looked like it really hurt but actually nothing bad happened. I just checked it over and made sure the wing was still in firm (as firm as they can be with this much "experience") and checked the aileron servo connections.
If you liked this my latest blog post, please leave a comment and let me know. Even if you didn't like it, leave me a comment as to what you didn't like. Either way, be sure to come back and check for future posts.
Tuesday, December 13, 2011
Gearing Up for a Landing
I’ve made a decision about my Wild Hawk. A decision that is the opposite of the one that I made when I first received the plane. A decision that goes against all the recommendations that I received when I first queried experienced Wild Hawk owners regarding the plane. So, just what is this decision that I made? I’m adding the landing gear back to my plane!
Why am I doing this? And, why did I remove them in the first place? Well, first why did I take them off and leave them off. I took them off for two reasons. The first reason is that having landing gear of such a light plane can cause landing problems for inexperienced fliers such as I was. The second reason was that all the areas that I expected to fly at had no landing strips. My Dad’s location is a rough plowed field, usually with tall weeds. My only other current location is a local park and preserve area. The preserve area does have a 10ft wide walk way that cuts through it, but it is lined on either side with 8 x 8 posts threaded with 1/2in cable. Not very inviting!
Now I’m adding my landing gear back because, I’ve now successfully landed on the walk way twice, and I have plans to join a local club that has a really nice runway. I figure this will also prepare me for bigger and better airplanes that will have landing gear. Besides they just snap in and out (see my pictures and videos below).
So what is adding the landing gear back onto the plane going to do to how it will fly? OK, I know that the landing gear is just wire with foam rubber wheels and they weigh next to nothing, and so the weight should not affect the plane very much and they are close enough to the CG that I don't expect them to affect the CG. But, the big thing in my mind is that they are not exactly aerodynamic. Again, they are not that big, but on such a light plane they could have a drag affect. This affect could be to make the nose drop as the pull would be on the bottom and to the rear using the CG as a fulcrum. Will this be enough to affect the flight and require trimming? Will I need to redistribute the weight? Will flying speed make a difference?
F759M5X8N5NA
Why am I doing this? And, why did I remove them in the first place? Well, first why did I take them off and leave them off. I took them off for two reasons. The first reason is that having landing gear of such a light plane can cause landing problems for inexperienced fliers such as I was. The second reason was that all the areas that I expected to fly at had no landing strips. My Dad’s location is a rough plowed field, usually with tall weeds. My only other current location is a local park and preserve area. The preserve area does have a 10ft wide walk way that cuts through it, but it is lined on either side with 8 x 8 posts threaded with 1/2in cable. Not very inviting!
Now I’m adding my landing gear back because, I’ve now successfully landed on the walk way twice, and I have plans to join a local club that has a really nice runway. I figure this will also prepare me for bigger and better airplanes that will have landing gear. Besides they just snap in and out (see my pictures and videos below).
 |
| Wild Hawk landing gear |
 |
| Cutting tape out of the gear mounting slot |
 |
| Gear installed |
Landing Gear in.
Landing gear out.
So what is adding the landing gear back onto the plane going to do to how it will fly? OK, I know that the landing gear is just wire with foam rubber wheels and they weigh next to nothing, and so the weight should not affect the plane very much and they are close enough to the CG that I don't expect them to affect the CG. But, the big thing in my mind is that they are not exactly aerodynamic. Again, they are not that big, but on such a light plane they could have a drag affect. This affect could be to make the nose drop as the pull would be on the bottom and to the rear using the CG as a fulcrum. Will this be enough to affect the flight and require trimming? Will I need to redistribute the weight? Will flying speed make a difference?
Since I do not have a wind tunnel, I'll have to rely on flying the Wild Hawk to see what will actually happen. Now I am waiting for a good day to fly. Once I have flown the plane (successfully or not) I will post an update on what affect this had, if any!
Ooops! Blooper!
F759M5X8N5NA
Sunday, November 27, 2011
Even More Power!
OK, I decided that I need more power. I went online to my favorite hobby store site and purchased a new battery (2200mah, 3C), brush-less outrunner motor, and speed controller. They actually came in some time ago but I just got around to installing and setting everything up. A few things I had to take care of first like charging the battery and figuring out how to setup the speed controller. I connected the battery to my charger and topped it off. Then I checked the battery with my voltage checker and each cell read out very close, just the way I like to see it. Now I needed to check out the speed controller as it usually requires a programmer to set it up. I found out the speed controller could also be programmed to the default setting (which happen to be what I want) by using the transmitter. This is done by powering up with the throttle in the full position and waiting for a certain number of beeps, returning the throttle to the off position and waiting for the required beeps, and then putting the throttle back to full and waiting for beeps again and then put the throttle back to the off position. After all of this, it works just fine. So, I setup the receiver, speed controller, battery, and motor and checked everything out with the transmitter. All worked as expected.
 Now it was time to figure out how I was going to mount everything on the plane. I started by removing the old motor and speed controller. This required loosening the hot glue I had added to the motor, cutting the wires, and pulling on it until it came out. Then I pulled out the wires from the speed controller, removed the power switch, disconnected from the receiver, and then completely removed it. Now everything is out of the way and I can see how it will all fit.

I had already held the motor up in position next to the original and marked the nacelle. I mounted a three blade prop that I had on hand just for reference. So now was the time to start cutting.

 I cut out a big chunk of the nacelle and made sure the surface was level. I cut out a piece of hardwood to use for a firewall.
I marked the piece to find the center for mounting the motor.

 Next I tried the fit and found I needed a notch for the firewall to fit better. I also figured it would give more stability since so much foam was cut out.
Now it was time to dry fit all the motor pieces before permanently installing anything. Everything was laid out to make sure I have everything I needed. Since the screws to attach the motor to the aluminum mount would be hidden and not easily accessible, I made sure they were locktited in (reddish purple tube). I decided to use wood screws with lock washers on the firewall since I would not be able to get to the back side if I used bolts with nuts once all was glued in place.


Here is the aluminum mount with the locktited screws, and to the right, mounted to the firewall with wood screws and lock washers.
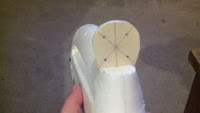 Now that I was happy with everything, I decided to trim the wood down for a more aerodynamic profile. I did this by holding the firewall in place and then tracing the nacelle outline on the back side. Then I used a belt sander to trim it down to the profile I marked out. Next I glued it in place with hot glue. I made sure that the perimeter and slot were glued well. I also added a vertical line to use to align the firewall with the seams in the foam (this helped a lot for centering).

I noticed that there was still a little flex in the new nacelle and so used some tooth picks to stiffen things up. I ran two strait down on either side of the seam and then two more at an angle from just behind the wood to the front of the nacelle.
 Now I screwed the motor back on being careful to make sure the wood screws went right back into the threads they cut during the dry fitting. This I know will ensure the best performance and least chance of failure. I also made sure that the screws were torqued down just enough to collapse the lock washers.
 Now I need to get the battery in place. I noticed that it was not going to fit at all unless I started cutting things up. I really wanted it to be as far forward as reasonable to maintain the C. G. I bit the bullet and opted for major surgery and sliced off the top of the nose. This allowed for full access to the battery compartment. I laid the battery where I wanted it and marked what needed to be cleared away. I then used my soldering iron with a nail in place of the soldering tip and melted the foam until there was enough room. I like to melt the foam instead of cutting it out as I feel that it helps to retain structural integrity. Any way, once I was happy with the space, I hot glued the top back on. I did not use any tooth picks for support as this section will be well taped with strapping tape.
 Finally I'm getting to the speed controller. It seemed to fit well just laying it out from the motor to the cockpit opening. The two power wires were just far enough apart (being on either side of the controller circuit board) that the cover tab fits right in between them. Instead of gluing it down, I opted for just taping it in place with strapping tape. There were two reasons for mounting it the way I did. One is that this was way easier than threading the wires through the foam, and two, it would provide for better cooling if needed. So this configuration worked great other than the power connectors having to make an awkward loop to connect. A little tucking of wires and rubber bands to hold down the canopy and no one is the wiser.
I powered up my radio then plugged the battery in (I no longer have an on/off switch) and everything worked as expected. I am very happy with this and cannot wait to get out and fly this thing.
Thanks for stopping by my blog and please post comments, good or bad. Be sure to come back and check for future posts.
 Now it was time to figure out how I was going to mount everything on the plane. I started by removing the old motor and speed controller. This required loosening the hot glue I had added to the motor, cutting the wires, and pulling on it until it came out. Then I pulled out the wires from the speed controller, removed the power switch, disconnected from the receiver, and then completely removed it. Now everything is out of the way and I can see how it will all fit.
I had already held the motor up in position next to the original and marked the nacelle. I mounted a three blade prop that I had on hand just for reference. So now was the time to start cutting.

 I cut out a big chunk of the nacelle and made sure the surface was level. I cut out a piece of hardwood to use for a firewall.
I marked the piece to find the center for mounting the motor.

 Next I tried the fit and found I needed a notch for the firewall to fit better. I also figured it would give more stability since so much foam was cut out.
Now it was time to dry fit all the motor pieces before permanently installing anything. Everything was laid out to make sure I have everything I needed. Since the screws to attach the motor to the aluminum mount would be hidden and not easily accessible, I made sure they were locktited in (reddish purple tube). I decided to use wood screws with lock washers on the firewall since I would not be able to get to the back side if I used bolts with nuts once all was glued in place.


Here is the aluminum mount with the locktited screws, and to the right, mounted to the firewall with wood screws and lock washers.


I noticed that there was still a little flex in the new nacelle and so used some tooth picks to stiffen things up. I ran two strait down on either side of the seam and then two more at an angle from just behind the wood to the front of the nacelle.
 Now I screwed the motor back on being careful to make sure the wood screws went right back into the threads they cut during the dry fitting. This I know will ensure the best performance and least chance of failure. I also made sure that the screws were torqued down just enough to collapse the lock washers.
 Now I need to get the battery in place. I noticed that it was not going to fit at all unless I started cutting things up. I really wanted it to be as far forward as reasonable to maintain the C. G. I bit the bullet and opted for major surgery and sliced off the top of the nose. This allowed for full access to the battery compartment. I laid the battery where I wanted it and marked what needed to be cleared away. I then used my soldering iron with a nail in place of the soldering tip and melted the foam until there was enough room. I like to melt the foam instead of cutting it out as I feel that it helps to retain structural integrity. Any way, once I was happy with the space, I hot glued the top back on. I did not use any tooth picks for support as this section will be well taped with strapping tape.
I powered up my radio then plugged the battery in (I no longer have an on/off switch) and everything worked as expected. I am very happy with this and cannot wait to get out and fly this thing.
Thanks for stopping by my blog and please post comments, good or bad. Be sure to come back and check for future posts.
Wednesday, August 17, 2011
Flying in the wind
After complaining about too much wind and not being able to fly, I was now waiting for a chance to fly with wind. Yeah, I wanted to test if it would make much of a difference flying in the wind with ailerons. So, finally a chance to fly and a day with wind. About 8 to 10 mph.
I started with a full charge on the stock NiMH battery and tossed the aileron equipped Wild Hawk into the wind. Wow, it flew great! The ailerons really made a difference if keeping the plane in the air. I continued to fly and enjoy playing in the wind. I did notice that one drawback to flying in the wind is that you can only fly into the wind if you have the battery to do it. I had to bring the plane in long before I normally would have while I still had enough power to bring it in.
So my flying in the wind was a success and I had a great time. I was so eager to fly again that I went our as soon as I could. I was having a great time and even decided to try a few loops. Good thing I only tried one though because as soon as it pulled full Gs, I noticed that the wings had an odd angle to them. I put the plane through a few more maneuvers and noticed the same odd wing angle. Oops, time to bring it in!
Well, I brought the plane in a little too aggressive in an attempt to keep the wings in one piece and lost an aileron servo. No big deal, and it will teach me not to hot glue servos in on the side with a sticker. The bond is only as good as the sticker glue!
Ok, so upon inspection, I found that the wings were both starting to kink and flex right at the line where the wing spar ends and the aileron servo cutout and aileron cutout weakened the wing. Another learning experience, watch out where you make alterations and where the stress points are!
Now I need to figure out how I'm going to strengthen my wings so they don't crack and give out during a flight. That will be my next blog.
Thanks for stopping by my blog and please post comments, good or bad. Be sure to come back and check for future posts.
I started with a full charge on the stock NiMH battery and tossed the aileron equipped Wild Hawk into the wind. Wow, it flew great! The ailerons really made a difference if keeping the plane in the air. I continued to fly and enjoy playing in the wind. I did notice that one drawback to flying in the wind is that you can only fly into the wind if you have the battery to do it. I had to bring the plane in long before I normally would have while I still had enough power to bring it in.
So my flying in the wind was a success and I had a great time. I was so eager to fly again that I went our as soon as I could. I was having a great time and even decided to try a few loops. Good thing I only tried one though because as soon as it pulled full Gs, I noticed that the wings had an odd angle to them. I put the plane through a few more maneuvers and noticed the same odd wing angle. Oops, time to bring it in!
 |
| Servo label nicely glued into the cutout! |
Well, I brought the plane in a little too aggressive in an attempt to keep the wings in one piece and lost an aileron servo. No big deal, and it will teach me not to hot glue servos in on the side with a sticker. The bond is only as good as the sticker glue!
 |
| Wing crease right about where the window divider in the back groung meets the wing |
Now I need to figure out how I'm going to strengthen my wings so they don't crack and give out during a flight. That will be my next blog.
Thanks for stopping by my blog and please post comments, good or bad. Be sure to come back and check for future posts.
Wednesday, July 20, 2011
Aileron time
Well, I flew someone else's plane using only elevator and ailerons, with both on the same stick and loved it. I decided that since this is the normal configuration for transmitters, I should use that configuration now and not incur a learning curve later.
 Now I have ailerons to install.
I started by ordering two servos (9 gram), Y cable, and extension cables from HobbyPartz.com. When they arrived and I opened the package, I was a little concerned with these servos. OK, I know I bought the cheapest ones they had, but still I thought I may have made a mistake. But now after installing them and testing them out, I love them! They are great little servos and faster than the stock ones installed.
 The start of measuring the ailerons. This was a bit tricky as I had no plans and only suggestions from the Internet as to how far to start them from the root of the wing. Some people said 5" and others said 2". I decided on about 3.5" and then took them out to just before the wing tip bends up. This will still give me a full aileron if I decide to cut the wing tips off.

The first cut. Very nerve racking. I also decided to make them 2" deep. I had seen others make them only about 1", and then go on to later add extensions. I would rather have to tune them back on the linkage side then add to them latter with extra foam or balsa.
 First aileron all cut out. Now to make a duplicate on the other side.
 Start of installing the hinges. I had originally cut everything square with the intention of doing a hinge like I did for the tail. Boy was that a failure. I found out that that type of hinge works best on thin edges only and on the thick cross section I was now working with, they had way too much play. So I changed gears and went to the bevel cut and top side tape hinge. A much better plan.
 Hinges installed. Just used strapping tape. I had fully intended to use a single strip of clear packing tape, or at least to cut even sized pieces and to a neater job, but I got impatient and just used them like they are.
 I needed some control horns and did not want to go out and buy some. I was also too impatient to wait for an order to arrive. So, I did some research on how to make my own, and this is what I settled on.
I made my own control horns from an old AT&T SIM card (see it in the picture?). These were just pushed into slots cut with a razor knife and then glued with a bead of hot glue. To make the slot I just lined them up with the servo arm, tilted them over, and cut down the edge with my hobby knife (the one in the picture).
 Both servos installed. I hot glued the Y cable connectors into openings cut just below and behind the leading edge of the wing (
sorry, no pictures of this. Maybe later See update below). These were not as easy as I had thought they would be. When I started planning them, I realized that there was not a lot of room as the power switch and the air scoop I installed were right where I wanted them to be. Well, I found room.

 UPDATE - here are photos of the Y cable with the socket ends secured in the sides of the fuselage.
 Detail shots of the servos and the control horns installed. You can just see the hot glue beads on either side of the horns. I made cut-outs in the wings for the servos by setting them in place and cutting around them with a hobby knife. I then cut out the foam as best as I could and used a hot nail head (held with pliers) to smooth out the bottom of the cut-out. The servos only sit in about half of their thickness. I figured that would be good enough. They were then just hot glued in.
 Check out the snazzy push rods. They were made from one large paper clip! From this photo you can just make out that the servo is at the end of, and just to one side of the wing spar.
First flight. Actually 3 flights! And yeah, I flew it with masking tape holding the servo leads down.
 Now I have ailerons to install.
I started by ordering two servos (9 gram), Y cable, and extension cables from HobbyPartz.com. When they arrived and I opened the package, I was a little concerned with these servos. OK, I know I bought the cheapest ones they had, but still I thought I may have made a mistake. But now after installing them and testing them out, I love them! They are great little servos and faster than the stock ones installed.


The first cut. Very nerve racking. I also decided to make them 2" deep. I had seen others make them only about 1", and then go on to later add extensions. I would rather have to tune them back on the linkage side then add to them latter with extra foam or balsa.
 First aileron all cut out. Now to make a duplicate on the other side.
 Start of installing the hinges. I had originally cut everything square with the intention of doing a hinge like I did for the tail. Boy was that a failure. I found out that that type of hinge works best on thin edges only and on the thick cross section I was now working with, they had way too much play. So I changed gears and went to the bevel cut and top side tape hinge. A much better plan.
 Hinges installed. Just used strapping tape. I had fully intended to use a single strip of clear packing tape, or at least to cut even sized pieces and to a neater job, but I got impatient and just used them like they are.
I made my own control horns from an old AT&T SIM card (see it in the picture?). These were just pushed into slots cut with a razor knife and then glued with a bead of hot glue. To make the slot I just lined them up with the servo arm, tilted them over, and cut down the edge with my hobby knife (the one in the picture).
 Both servos installed. I hot glued the Y cable connectors into openings cut just below and behind the leading edge of the wing (
 UPDATE - here are photos of the Y cable with the socket ends secured in the sides of the fuselage.
 Detail shots of the servos and the control horns installed. You can just see the hot glue beads on either side of the horns. I made cut-outs in the wings for the servos by setting them in place and cutting around them with a hobby knife. I then cut out the foam as best as I could and used a hot nail head (held with pliers) to smooth out the bottom of the cut-out. The servos only sit in about half of their thickness. I figured that would be good enough. They were then just hot glued in.
 Check out the snazzy push rods. They were made from one large paper clip! From this photo you can just make out that the servo is at the end of, and just to one side of the wing spar.
Aileron test before flying. Not the best video as I was doing the camera and controls (who needs a tripod!).
I really like how the plane flies now and am waiting for my first chance to find out how well it performs in a wind.
UPDATE:
See my other blog post rcflyingfun flapperons to see how I upgraded this to flapperons with a new 6 channel radio and mixing.
Thanks for stopping by my blog and please post comments, good or bad. Be sure to come back and check for future posts.
Saturday, July 2, 2011
Hinged Again
 Ok, no sooner did I buy the CA glue and the thin hinges, and I saw a video about making tape hinges. This was the best hinge advice ever! The idea is that you take strips of tape about an inch long. These are joined together by overlapping them about 1/4 of an inch sticky side to sticky side. These are then run from one side of one surface to the other side of the other surface. Oh heck, this will make much more sense if you just watch the video. The part you'll want is about 5 minutes in.


Well I'm still waiting for he weather to behave and allow for some nice flying. So far any time I've been able to get out, the wind has been 10mph and higher. We'll see.
Thanks for stopping by my blog and please post comments, good or bad. Be sure to come back and check for future posts.
Subscribe to:
Posts (Atom)